Increase foot traffic to your stores using Facebook ads
Originally published
- Social Media
- How-to Guides
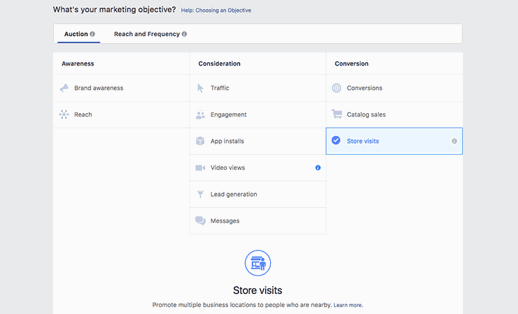
Did you know that you can create location-based ads for your company at scale using Facebook? That’s right, Facebook has developed tools within its Ads Manager that allow you to create custom, local ads for some or all of your locations quickly and easily. To take advantage of these tools, all you need to do is properly set up and publish your stores in a Facebook location structure. We’ll walk you through the process of creating local, custom ads to increase foot traffic step-by-step. For even more information, you can visit the Facebook support page on creating location-based ads here. Learn about Facebook location pages.
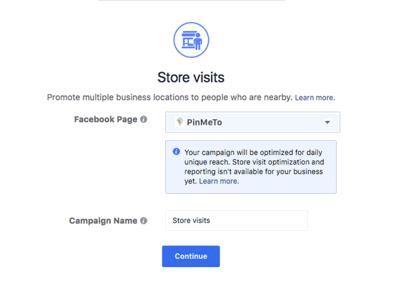
Next, you will need to select the Brand Page associated with the locations that you intend to use. For most people, there will only be one option here. Once you have the correct Brand Page selected, you need to give your campaign a name, and then click continue (see figure 2 below).
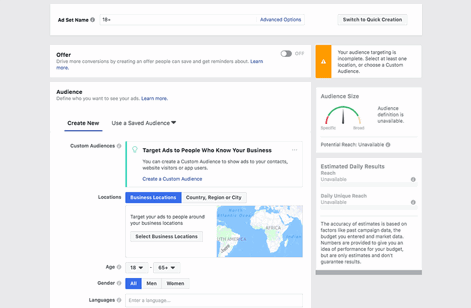
Once you have completed these steps, you’ll be given the opportunity to set your audience. There are far too many options in the audience section to cover here, but if you want to read about that subject in detail you can find Facebook’s guide here.
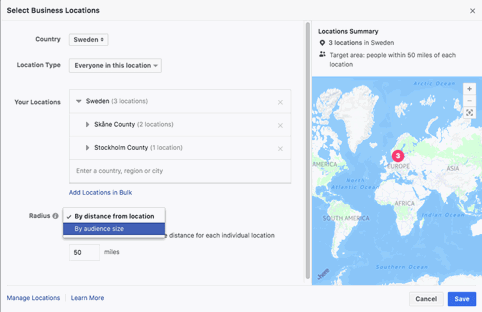
Once you have decided which locations you wish to include, you will be presented with the option to select a radius around your locations or to select your audience size and let FB decide where to show the ad (see figure 4 below).
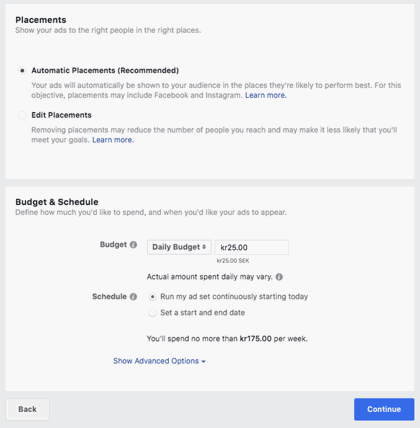
The next step in the process is to select the ad placement and select a budget (see figure 5 below). Since this process is identical to setting up any other sort of ad campaign, we won’t go into detail about how this is done in this post.
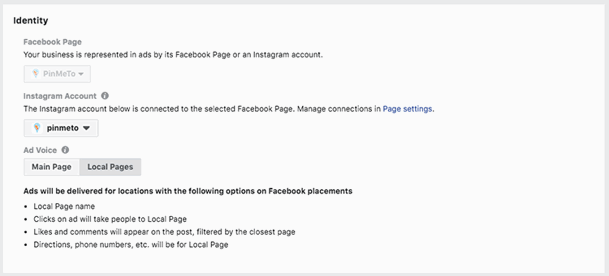
The next steps involve setting up exactly what you want your customers to see and what you want them to do. The identity of the ad will determine whether viewers are shown information about the brand page or whether they are given local store information. We recommend setting the identity as “local pages” in order to drive foot traffic to the closest store (see figure 6 below).
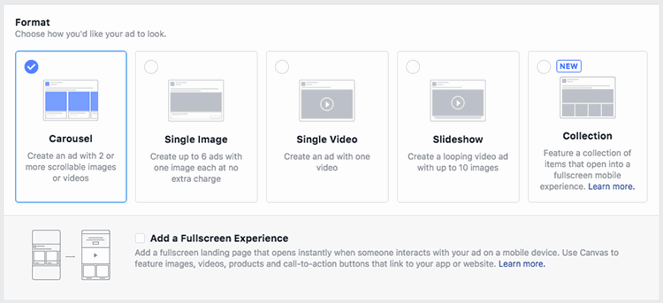
Next, you will need to select the format of your ad from the list provided and decide whether you wish to include a full-screen option (see figure 7 below).
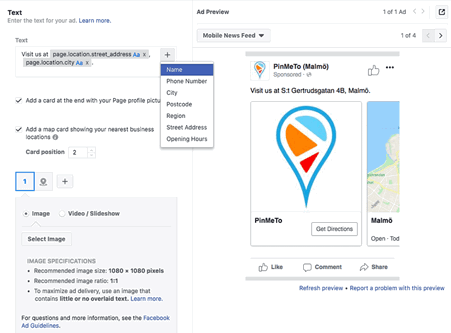
Finally, you need to write your text. You can customise the text using the included templated information such as phone number, street address, etc in order to make your posts even more locally relevant. There is also an option (on by default) that will display a map of the nearest location (see figure 8 below). You can also preview the ad to see how it will appear on Facebook and, if you have a connected account, on Instagram.
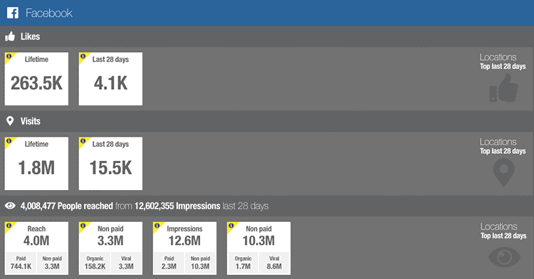
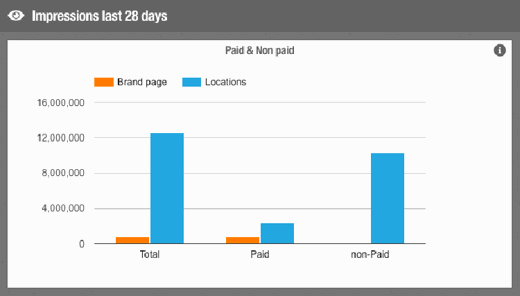
You’ve now created an ad campaign for your local stores! If you are using PinMeTo’s local social media management tools, you can go to the Insights section and see exactly how many paid views your ad is creating (see figures 9 and 10 below) as well as new likes, check-ins, etc while the ad is still running! This will give you an idea of how the ad is performing without having to wait for the campaign to complete to get a report from Facebook.
Recommended Articles

How to Market a Local Business Online: 5-Step Guide
Market your local business online with a 5-step guide, covering Google Business Profile, local SEO, social media, AI tools, and centralized platforms.
Lily Adamyan
How to Optimize Instagram for Google Search
Optimize Instagram for local discovery to boost your brand's visibility and drive foot traffic with location tags, UGC, and consistent local presence.
Lily Adamyan
A Guide to Multi-Location Customer Engagement
Explore strategies for multi-location brands to manage online communication, from social media engagement to effective review management.
Lily AdamyanFrequently Asked Questions
How do I create location-based Facebook ads for my stores?
How can social media ads drive foot traffic to physical stores?
What is the best Facebook ad format for driving in-store visits?
Subscribe to Our Newsletter
Get local SEO tips, product updates, and marketing insights for multi-location brands delivered to your inbox.
Ready to boost your local visibility?
See how PinMeTo helps multi-location brands manage listings, reviews, and local SEO at scale.
Book a Demo